Halloween is here!
It's more fun to play with the kids and make spooky or gross looking food, rather than spending a ton of time decorating! Here are some really cool Halloween decorating ideas that are fast, easy, and AFFORDABLE! Key word because most of the things I used can be purchased at the dollar store! See what other things you can find, and just be cre8tive with it! You can make so many awesome things with just a few supplies or items :-)
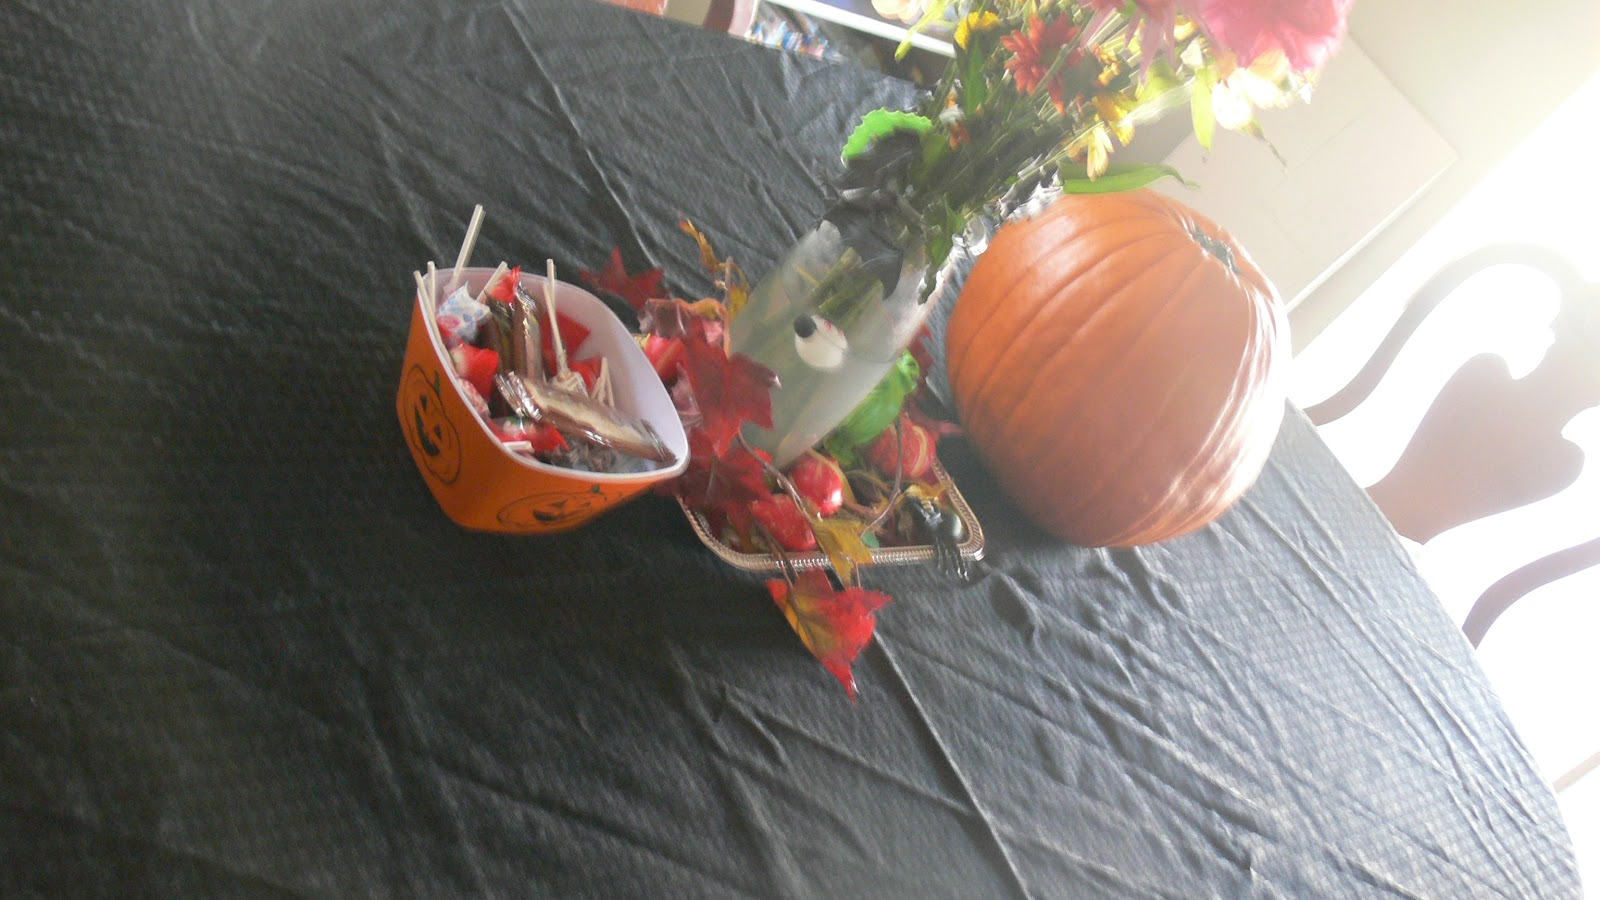
This tablescape is perfect for Halloween and super easy to create! I like to mix the creepy with the fun, so the kids get a little of both without being bored to scared! haha
A black tablecloth is a perfect base, and this tablecloth can be used for other things since its not Halloween-specific!
The little tray was bought at the dollar store, as well as the rubber insects and critter! I also got one strand of fall leaves and arranged everything on the tray. The hubby got me flowers a few days before, so they already have a dying look to them, which I think is a great touch for the Halloween look!
I also hung a few critters from the flowers in the vase, just to add more creepiness to the pretty flowers.
I also had a small plastic statue of Oogie Boogie from The Nightmare Before Christmas, and I added him to the tray. I found a bag of foam gourds at the dollar store, and it came with 5. I spread those along the tray as well, which i think helps pull in more of the look of autumn. After Halloween, just remove the creepy stuff and you have a great display for autumn or Thanksgiving!
A cute little candy dish on one side of the tray and a real, medium-sized pumpkin on the other. A nice cozy feeling of autumn fills the room with this tablescape!
A floating eyeball? Would Halloween be complete without it?! It was actually from a bubble container that one of my kids got last year. Once the bubbles were used, I saved the container and it made it's way into my dreary flower vase. Another small spooky touch that really adds to the fright of Halloween!
Another great aspect of this table display? Still plenty of room to sit and have our Halloween treats and dinner! This display is large enough to be a nice eye-catcher without taking over the whole table, we still have to eat right?! :-)
A quick and easy idea is to take a small box (I used a small wooden ledge box I had) and add a flower, as well as some more little bugs. I also had a few small pumpkin candles from previous years, so I put one i n the box along with some flies and a spider with a web. This took no time at all to throw together and sits on the ledge that separates my kitchen a dining room. Walking past the rose catches your eye but a closer look reveals the pretty flower and pumpkin have been overrun with Halloween critters!
Spider webbing is super affordable, about $1 per bag almost anywhere. Throw it over a house plant, fake or real, for an eerie plant display! No plants? No problem! Throw it around some pictures or wall shelves to give the feel of a haunted house!
Normally cards aren't sent for Halloween, but if you have little ones, you may get some! We have family in other states that send the kids Halloween cards, so I taped those along the side of my cabinet and left on the ledge with a small collection of candles! My oldest also made a spider that just HAD to go on the wall...
Pumpkins, Pumpkins! If you want to carve or create some pumpkin art, here are some ideas!
The classic pumpkin face is very easy and will always be a winner! Easy for younger people to carve too! A little more difficult ones can be just as fun! We used 2 stencils on one pumpkin, the BOO! and the bat, which came together very nicely! They will glow beautifully tonight!
My daughter, Lexi, LOVES the movie The Nightmare Before Christmas and so it seems almost every year, we have a Jack Skellington pumpkin! Last year, it was just his face and this year it was from his waist up. This one was the first carved,, as you can tell he is already starting to wilt! But, he will last through Halloween and that's what counts! Don't feel like carving or just dealing with the mess? We have ideas for that too!
Don't forget to recognize Breast Cancer Awareness, which is the entire month of October. We painted a pumpkin pink, then added dark pink glitter ribbons all over and topped it off with a pretty pink ribbon top!
Don't want to carve OR paint?1 I still have a solution for that too! I used regular straight pins and just pushed them into, creating a little scroll detail and then the word "Boo". I decided to add some black rhinestones just to give it a little something extra!
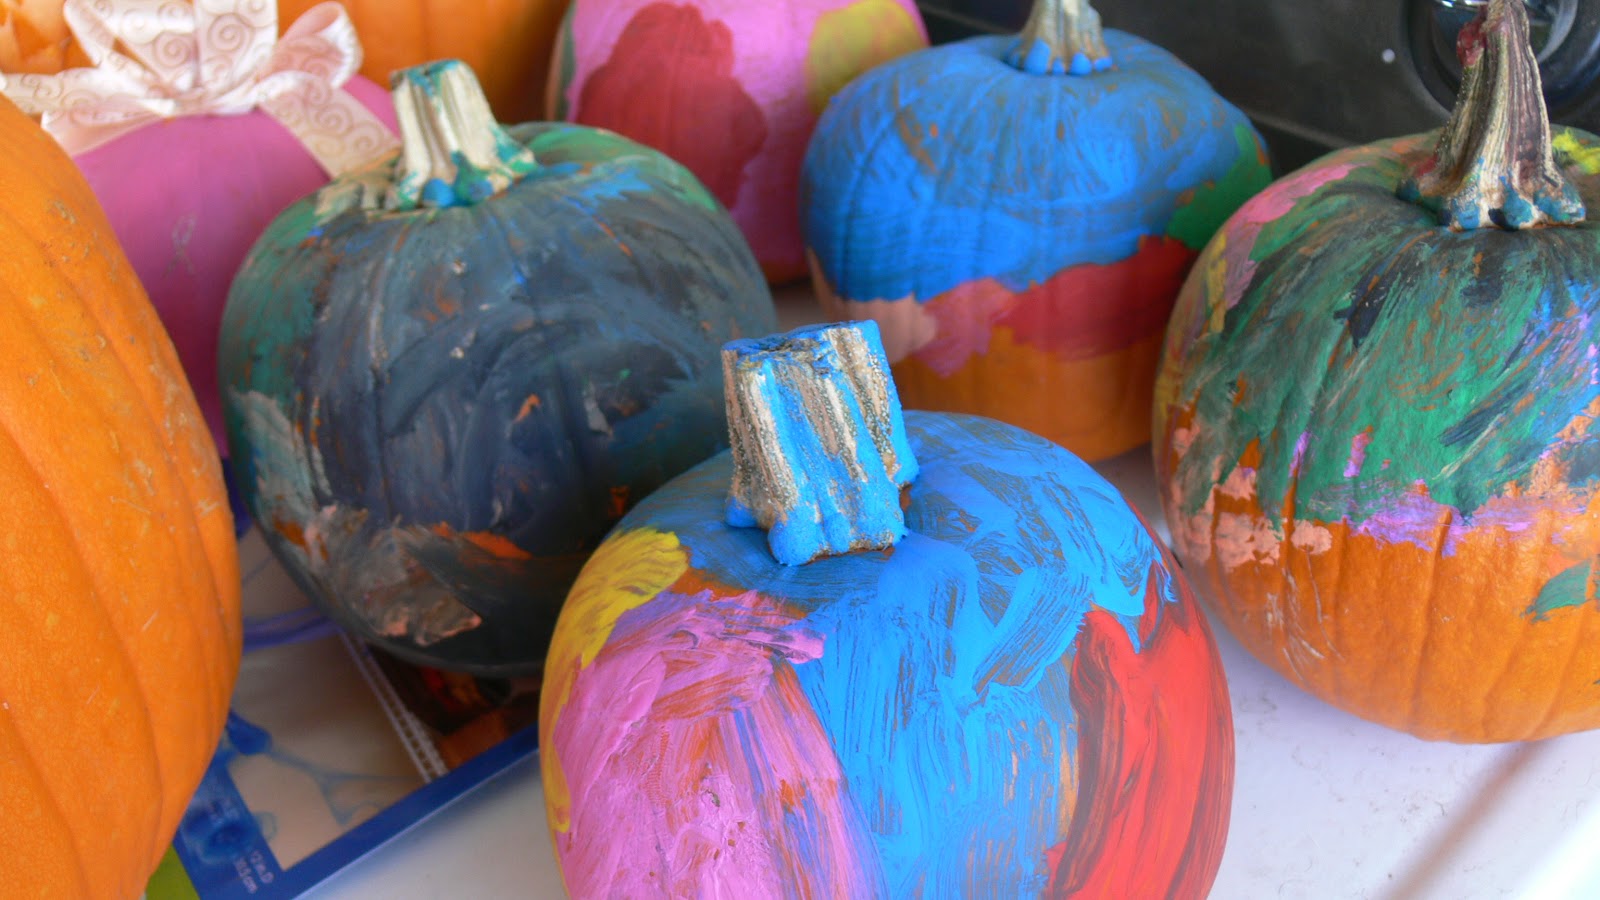
Lastly, if you have kids, let them have a fun and messy time(believe me, it IS messy!) and let them go crazy painting their own little pumpkins! You can see each kid's personality through their little pumpkin arts and if you use water-based acrylic paint, clean-up isn't so bad!
Hope you like this quick and easy decorating tips for Halloween! Christmas planning will be starting soon in this house so be on the look-put for upcoming Christmas decor and planning tips!
How do you like to decorate for Halloween? Would you try any of these easy decor ideas or do you have some great time or money-saving tips for Halloween decor? Post a comment below and share your thoughts or ideas!


Those pumpkins all looks really cute~!!
ReplyDelete